Eine Informationsseite hinzufügen
Fügen Sie Informationen zu Hoteleinrichtungen, lokalen Sehenswürdigkeiten und Stadtführern hinzu, die Gäste durchstöbern können.
Eine Informationsseite hinzufügen
Was Sie lernen werden: Wie Sie Inhalte wie "Öffnungszeiten des Hotelpools", "Top 5 Aktivitäten in der Stadt" oder "Spa-Etikette" veröffentlichen — reine Ansichtsseiten, die Gäste auf dem TV durchstöbern. Sie können dort nichts bestellen oder buchen; sie lesen nur.
Benötigte Zeit: 5–10 Minuten pro Seite.
Bevor Sie beginnen
Sie benötigen:
- Login-Zugang.
- Den Text und ein Foto für jede Seite.
- Eine Vorstellung davon, wie Sie diese gruppieren möchten (Kategorien wie "Stadtführer", "Hoteleinrichtungen", "Must-see").
Schritt 1: Informationsseiten öffnen
Klicken Sie in der linken Seitenleiste unter SERVICES auf Information Pages.
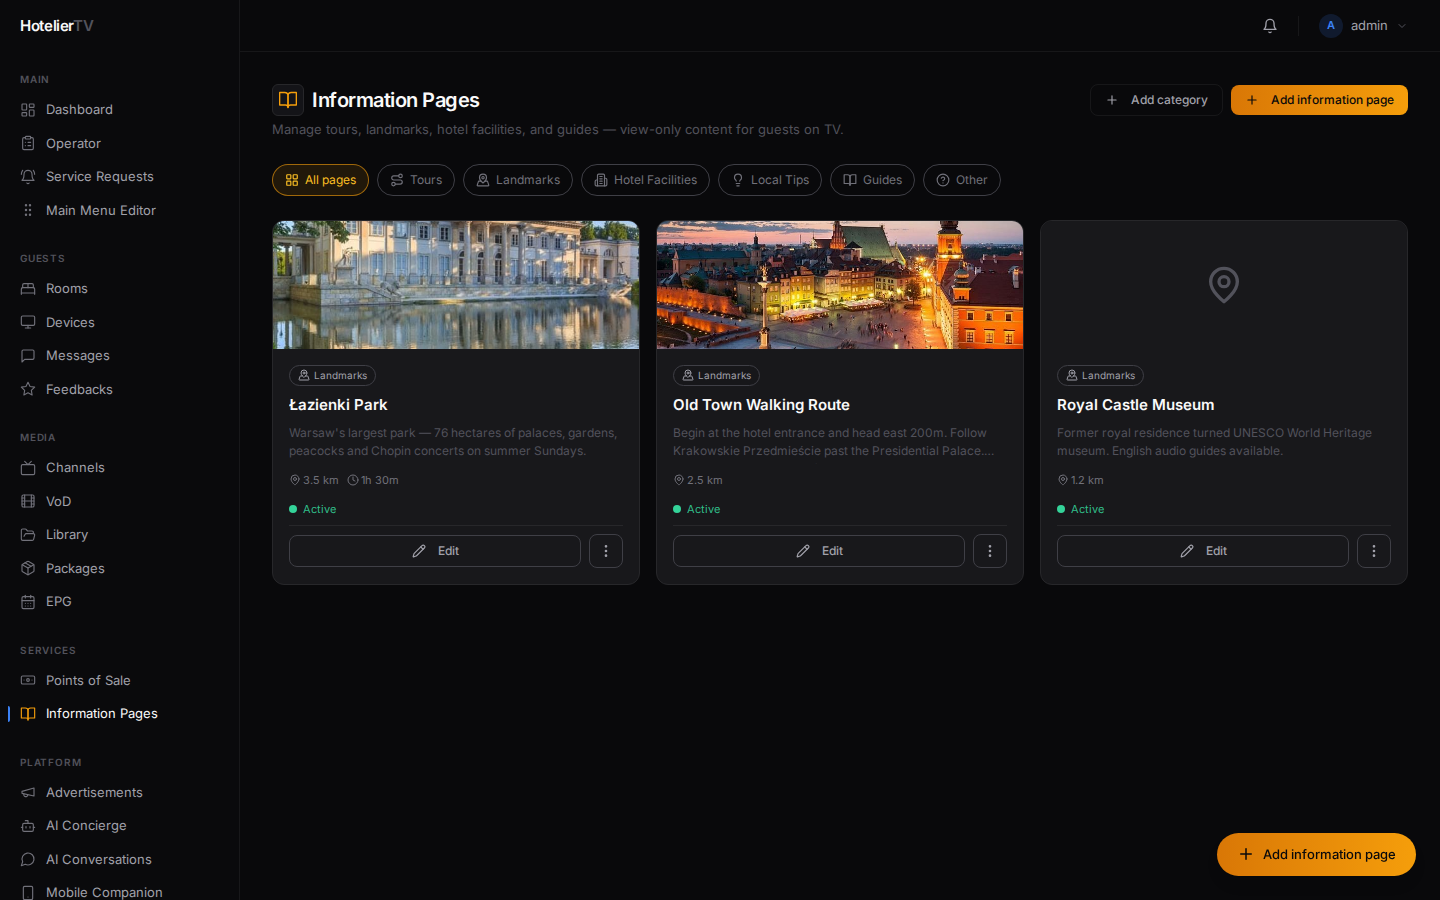
Wenn Sie dies zum ersten Mal tun, ist die Seite leer und zeigt die Schaltfläche [Create information area].
Schritt 2: Einen Informationsbereich erstellen (nur beim ersten Mal)
Klicken Sie auf [Create information area]. Das System erstellt einen Standardbereich namens "Information" — einen Container für all Ihre Seiten.
Dies müssen Sie nur einmal tun.
Schritt 3: Eine Kategorie hinzufügen
Klicken Sie oben rechts auf [+ Add category]. Geben Sie einen Kategorienamen wie "Stadtführer" oder "Hoteleinrichtungen" ein und klicken Sie auf [Add].
Sie können mehrere Kategorien anlegen. Jede Seite gehört zu einer Kategorie.
Schritt 4: Eine Informationsseite hinzufügen
Klicken Sie auf die orangefarbene Schaltfläche [+ Add information page] (oben rechts oder schwebend unten rechts).
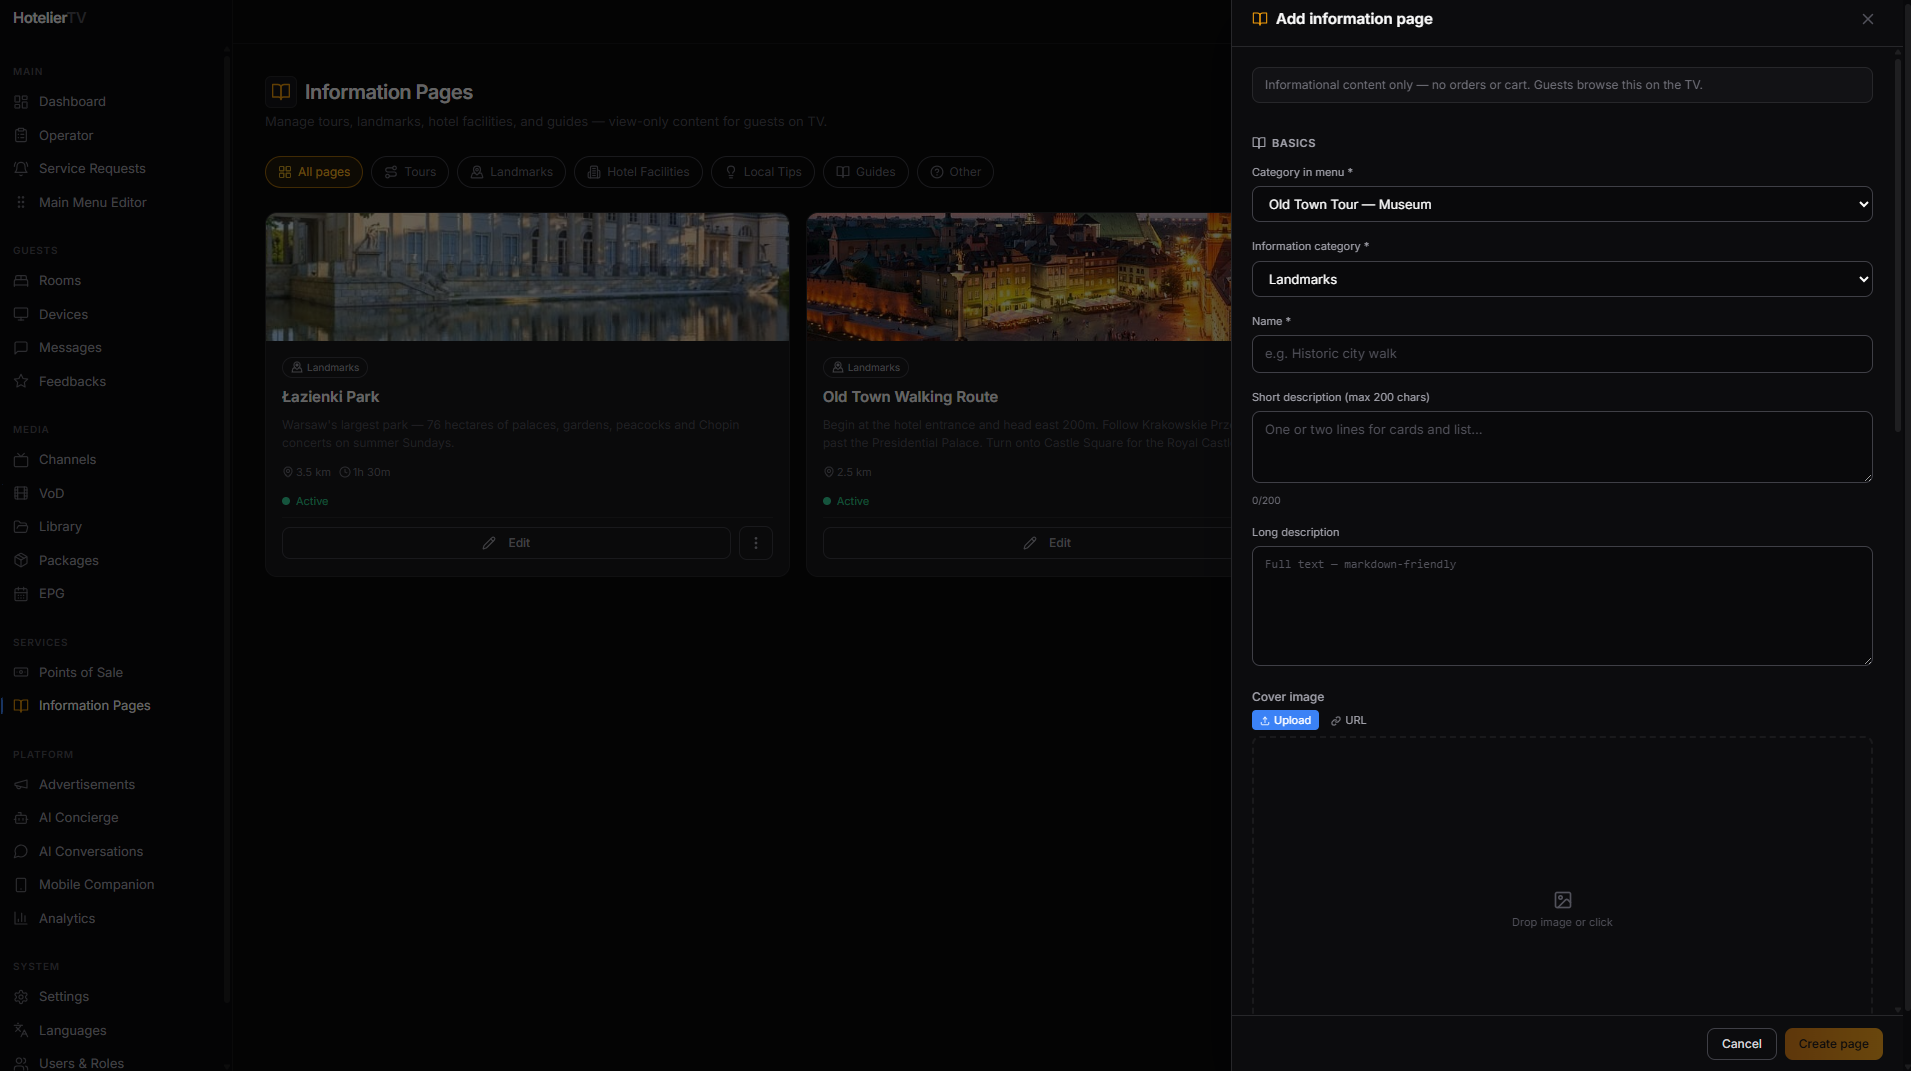
Der Seiteneditor öffnet sich. Füllen Sie Folgendes aus:
- Name — z. B. "Altstadt-Rundgang".
- Category — wählen Sie aus Ihren Kategorien.
- Description — ein kurzer Beschreibungstext (1–2 Sätze).
- Image — ein Hauptfoto (Hero-Bild). Laden Sie es hoch oder fügen Sie eine URL ein.
- Information category — ein farbiges Tag wie Landmarks, Food & Drink, Shopping, Hotel Facilities. Hilft Gästen beim Filtern.
- Distance — optional (z. B. "5 Min. Fußweg").
- Opening hours — optional, Freitext (z. B. "Mo–Fr 09:00–17:00").
- Duration — optional, in Minuten (für Touren).
- Address — optional.
- Featured — optionaler Schalter. Hervorgehobene Seiten erhalten auf dem TV ein kleines "Featured"-Tag.
- Active — Schalter. Aus = für Gäste verborgen, bleibt aber in Ihrer Verwaltungsoberfläche erhalten.
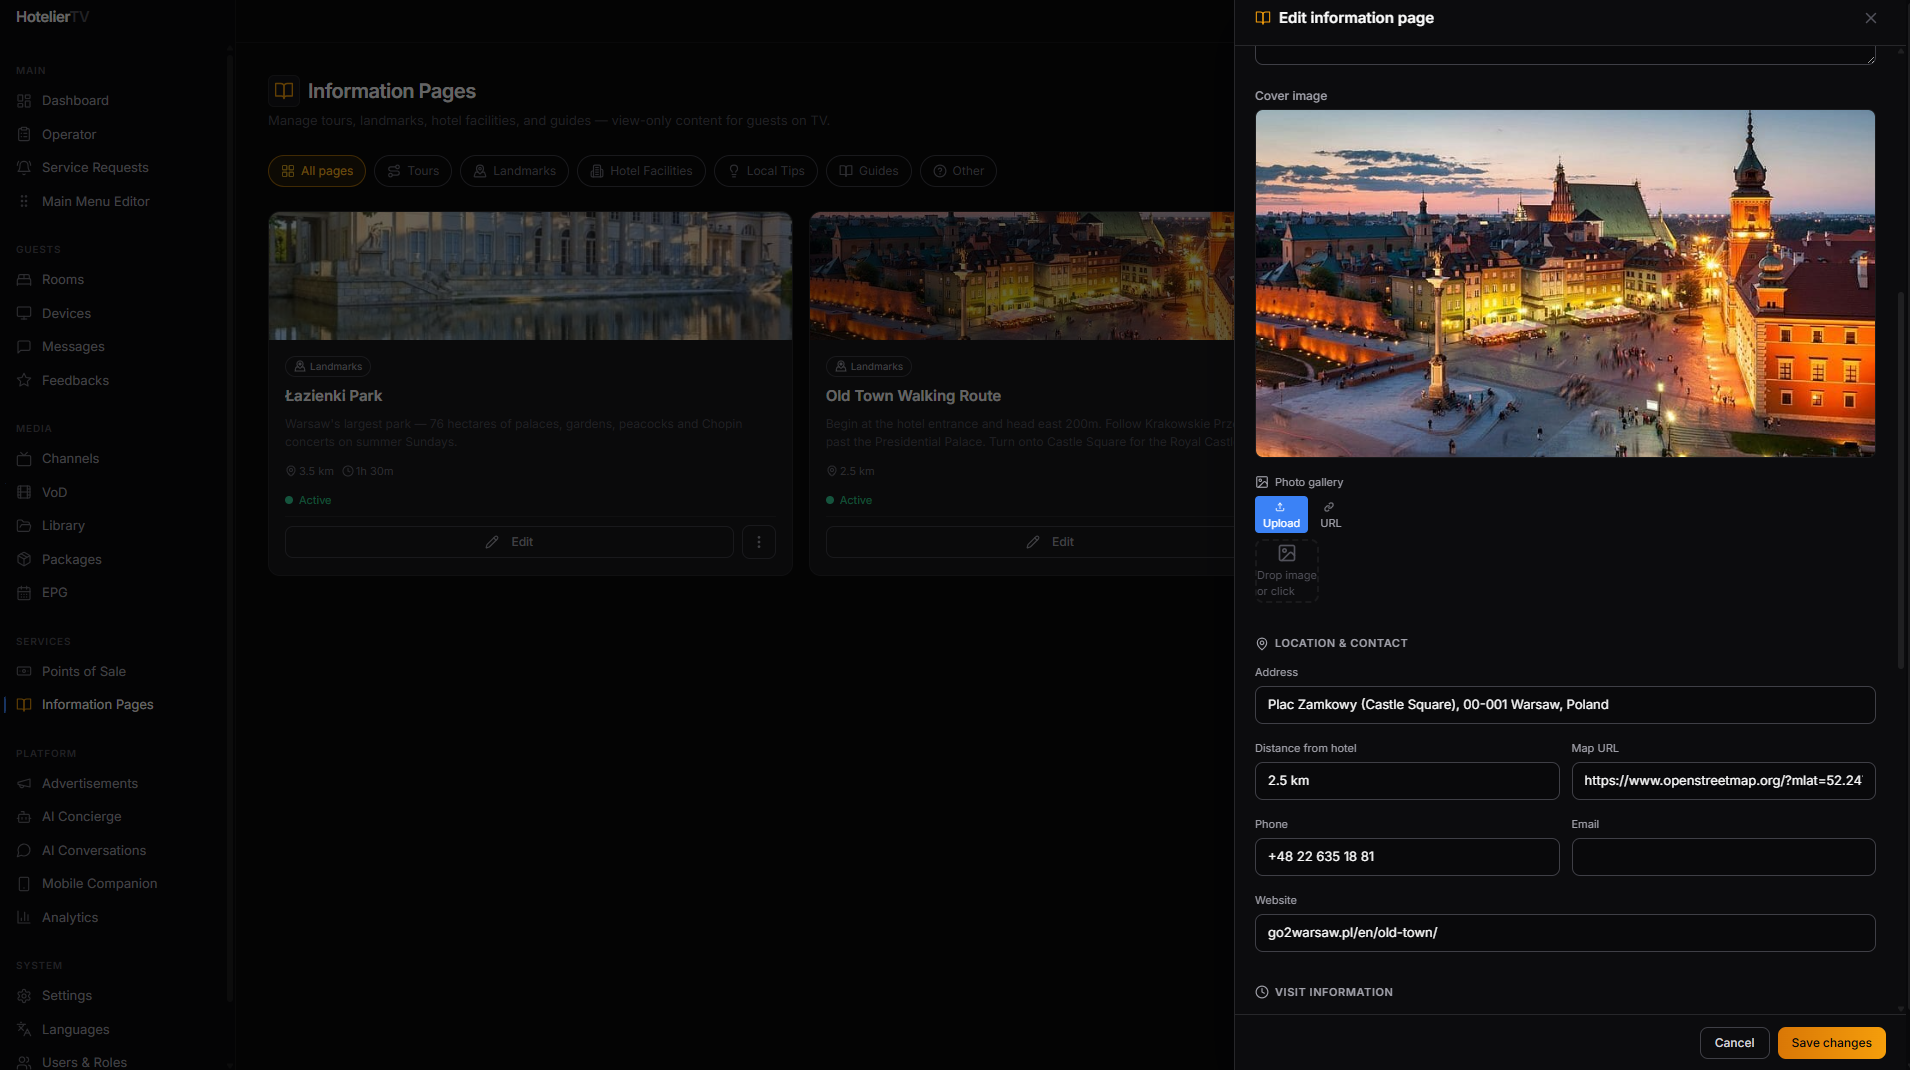
Klicken Sie unten auf [Save].
Schritt 5: Eine Kachel zum Hauptmenü hinzufügen
Damit der Informationsbereich für Gäste sichtbar wird, benötigen Sie eine Hauptmenü-Kachel, die darauf verweist.
- Main Menu Editor → [+ New item].
- Setzen Sie Type auf Service Area.
- Target = Ihr Informationsbereich (meist "Information" genannt).
- Titel: "Information" oder "Entdecken". Wählen Sie ein Symbol wie "book-open" oder "map-pin".
- Speichern.
Nun sehen Gäste "Information" auf dem Startbildschirm. Wenn sie darauf tippen, werden die von Ihnen erstellten Kategorien angezeigt. Das Tippen auf eine Kategorie zeigt die entsprechenden Seiten.
Siehe: Das Hauptmenü anpassen
Was tun, wenn es nicht funktioniert?
Die Schaltfläche "Add information page" ist ausgegraut: Sie müssen mindestens eine Kategorie haben. Klicken Sie zuerst auf [+ Add category].
Fehlermeldung "No information area" beim Hinzufügen einer Seite: Klicken Sie zuerst auf [Create information area]. Das System benötigt einen Container.
Die Seite wird nicht auf dem TV angezeigt: Zwei Dinge, die Sie überprüfen sollten:
- Der Schalter Active der Seite ist eingeschaltet.
- Das Hauptmenü verfügt über eine Kachel, die auf den Informationsbereich verweist.