Add a Restaurant
Set up a restaurant or room-service menu that guests can order from on the TV.
Add a Restaurant
What you'll learn: How to add a restaurant outlet (or room service) so guests can browse the menu and place orders from the TV.
Time needed: 15–30 minutes for the first one (most of it is typing menu items).
Before you start
You'll need:
- Login access. See First Login.
- The restaurant's name, opening hours, and a description.
- Optionally: a hero photo of the restaurant, and photos for menu items.
- Your menu — categories (Appetizers, Mains, Drinks…) and items (with prices).
Step 1: Open Points of Sale
In the left sidebar, under SERVICES, click Points of Sale.
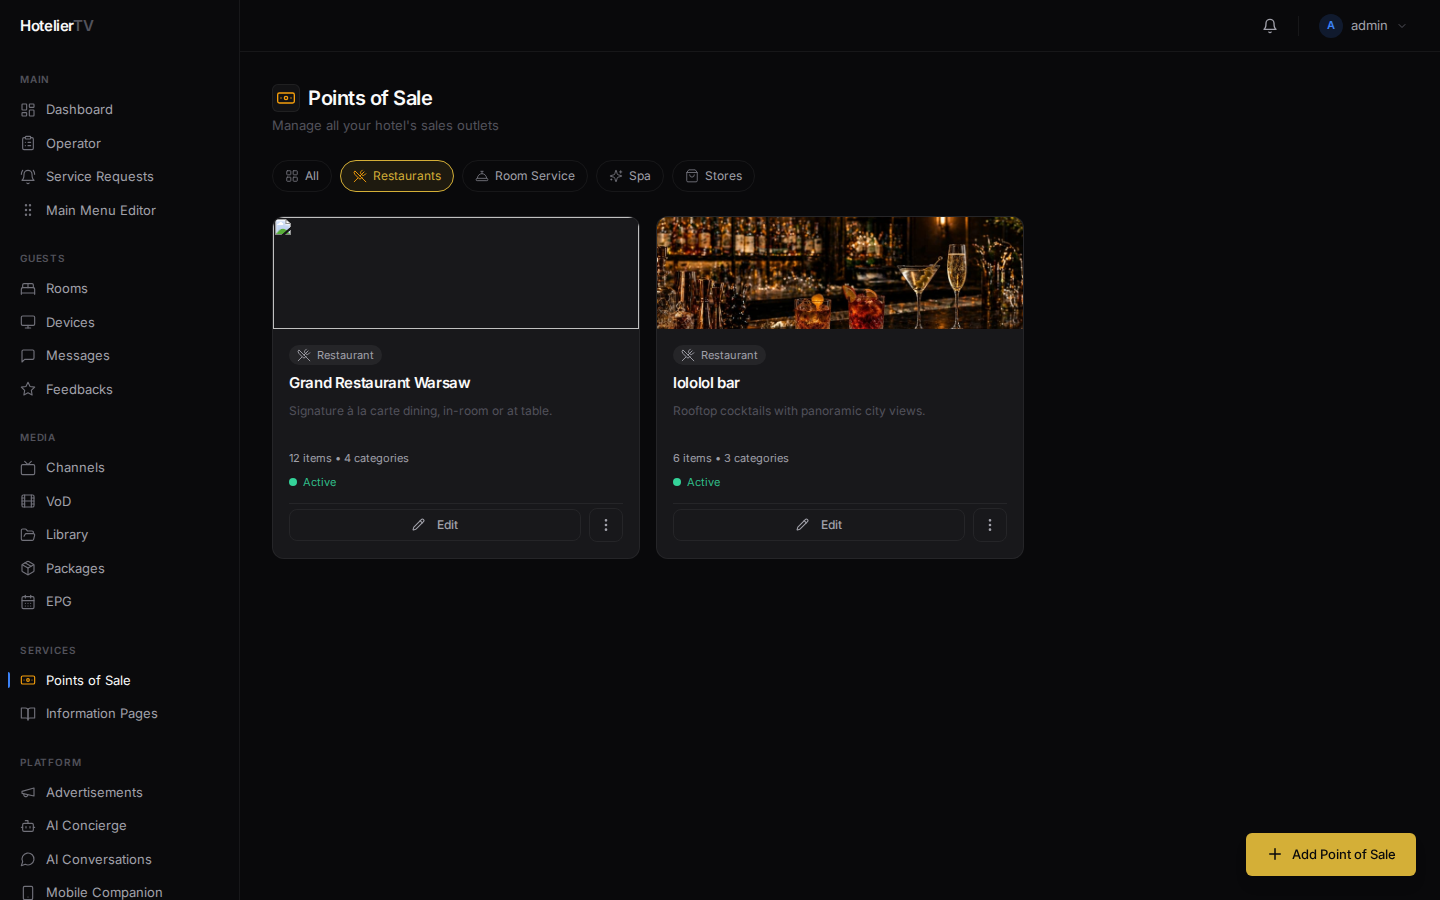
You'll see a list of all your sales outlets. Filter chips at the top let you narrow down to Restaurants, Room Service, Spa, or Stores.
Step 2: Click Add Point of Sale
Click the [+ Add Point of Sale] button (bottom-right floating button or top of the page).
You'll be taken to a two-step form:
- Choose a type — pick Restaurant (or Room Service for in-room dining delivery).
- Add basic details.
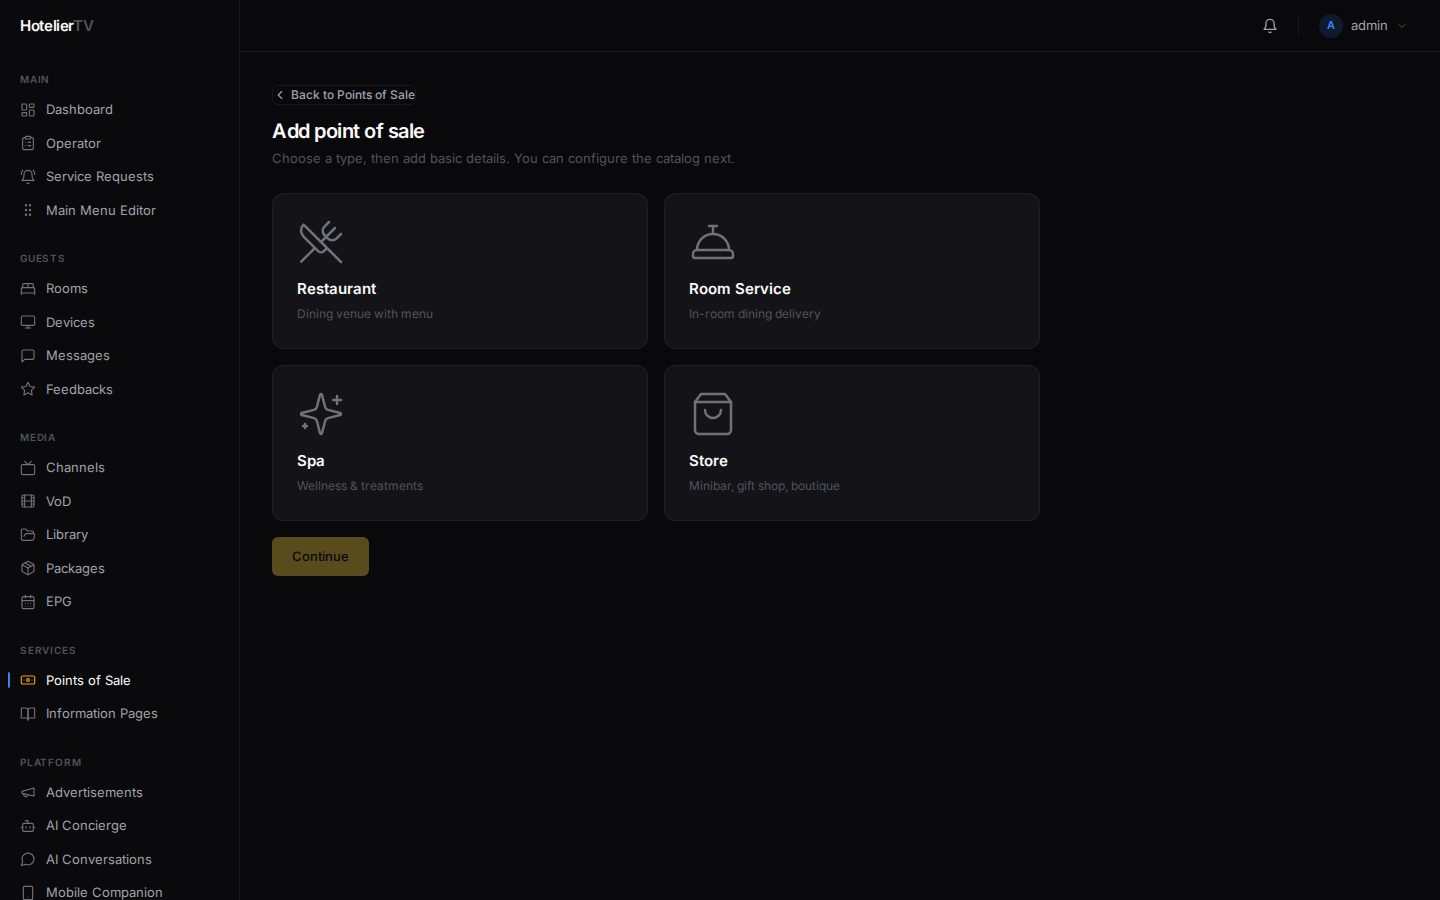
Click [Continue].
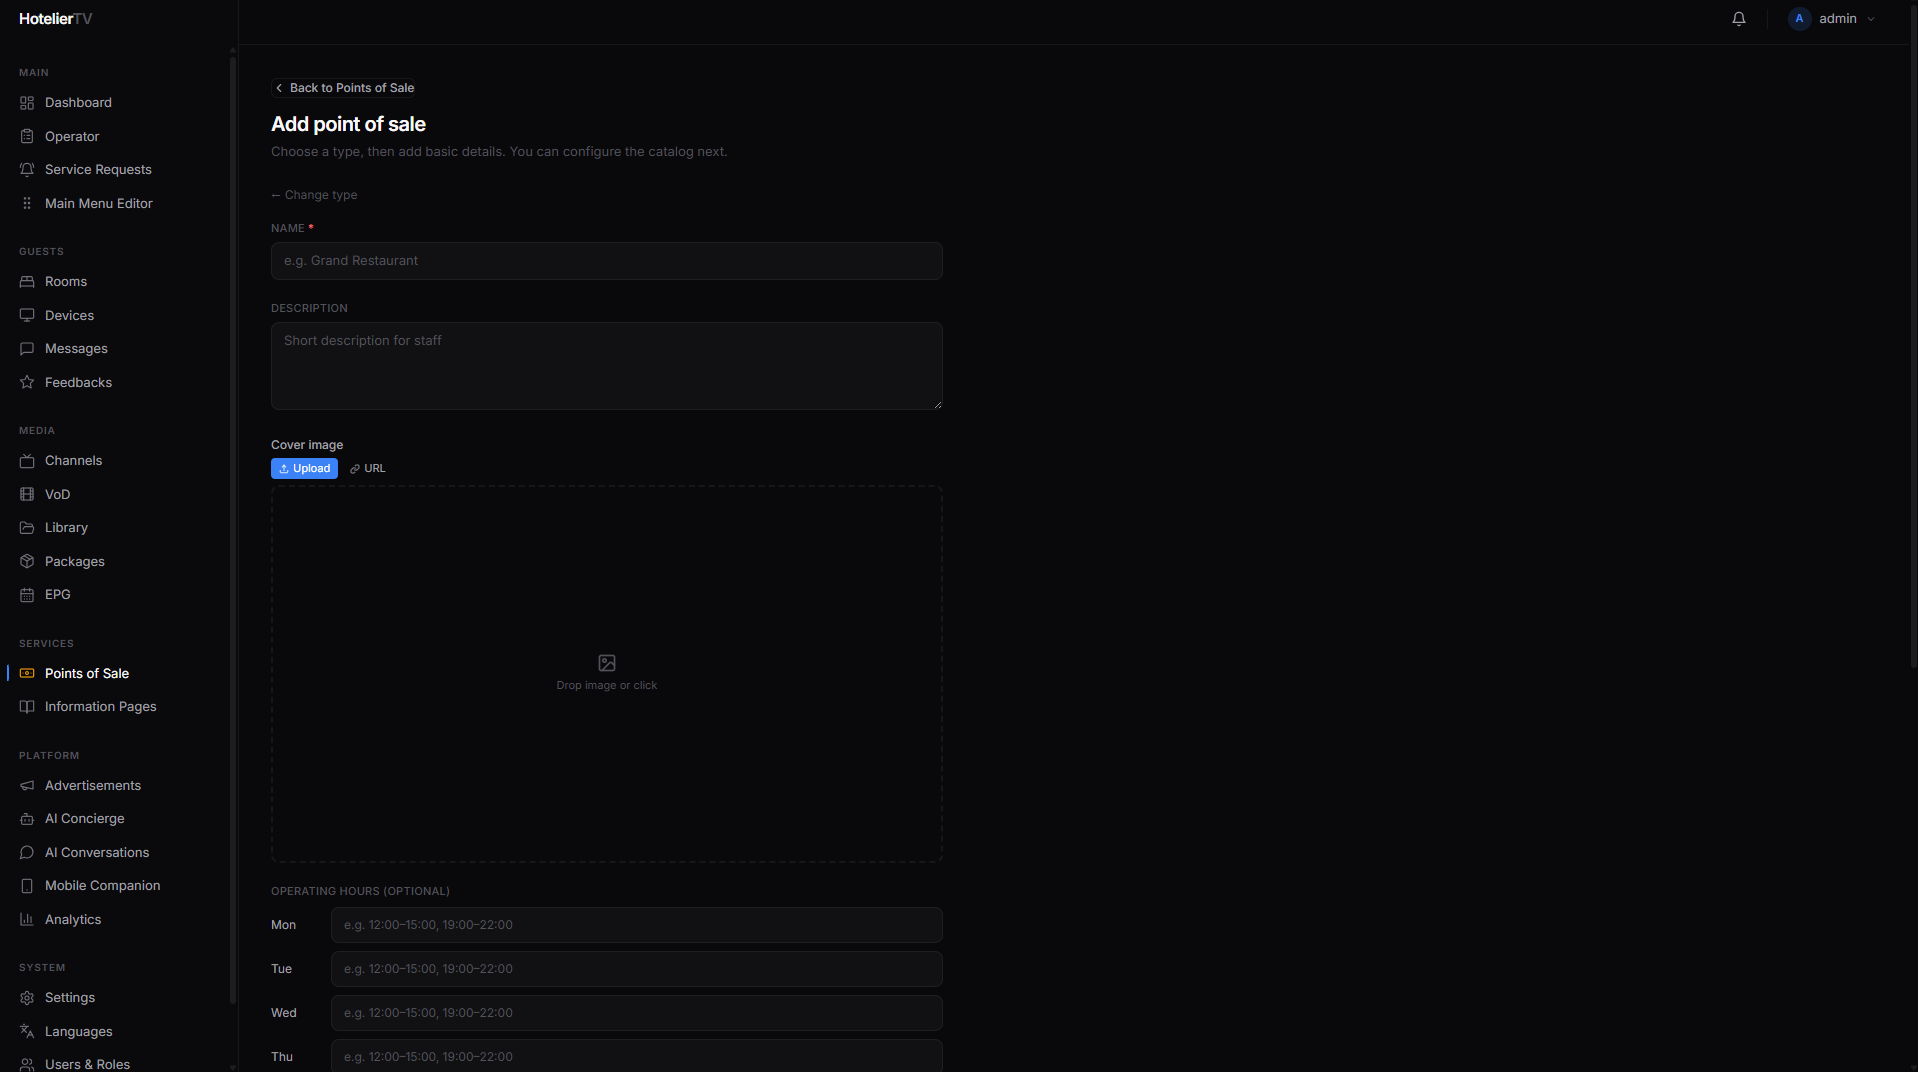
Step 3: Fill in basic details
You'll see a form with these fields:
- Name (required) — e.g. "Le Jardin".
- Description — a short blurb shown to guests.
- Image URL — an upload button or paste a URL. A nice hero photo helps.
- Active — toggle. Inactive outlets are hidden from guests.
- Operating hours — per-day text fields (e.g. "7:00–10:00, 19:00–23:00"). Leave blank for "always open".
- Layout — how the catalog is shown to guests (grid, list, etc.). The default is fine.
- Minimum order — for room service, the minimum amount in your hotel's currency.
- Delivery time — estimated minutes from order to room (room service only).
Click [Create and continue to catalog].
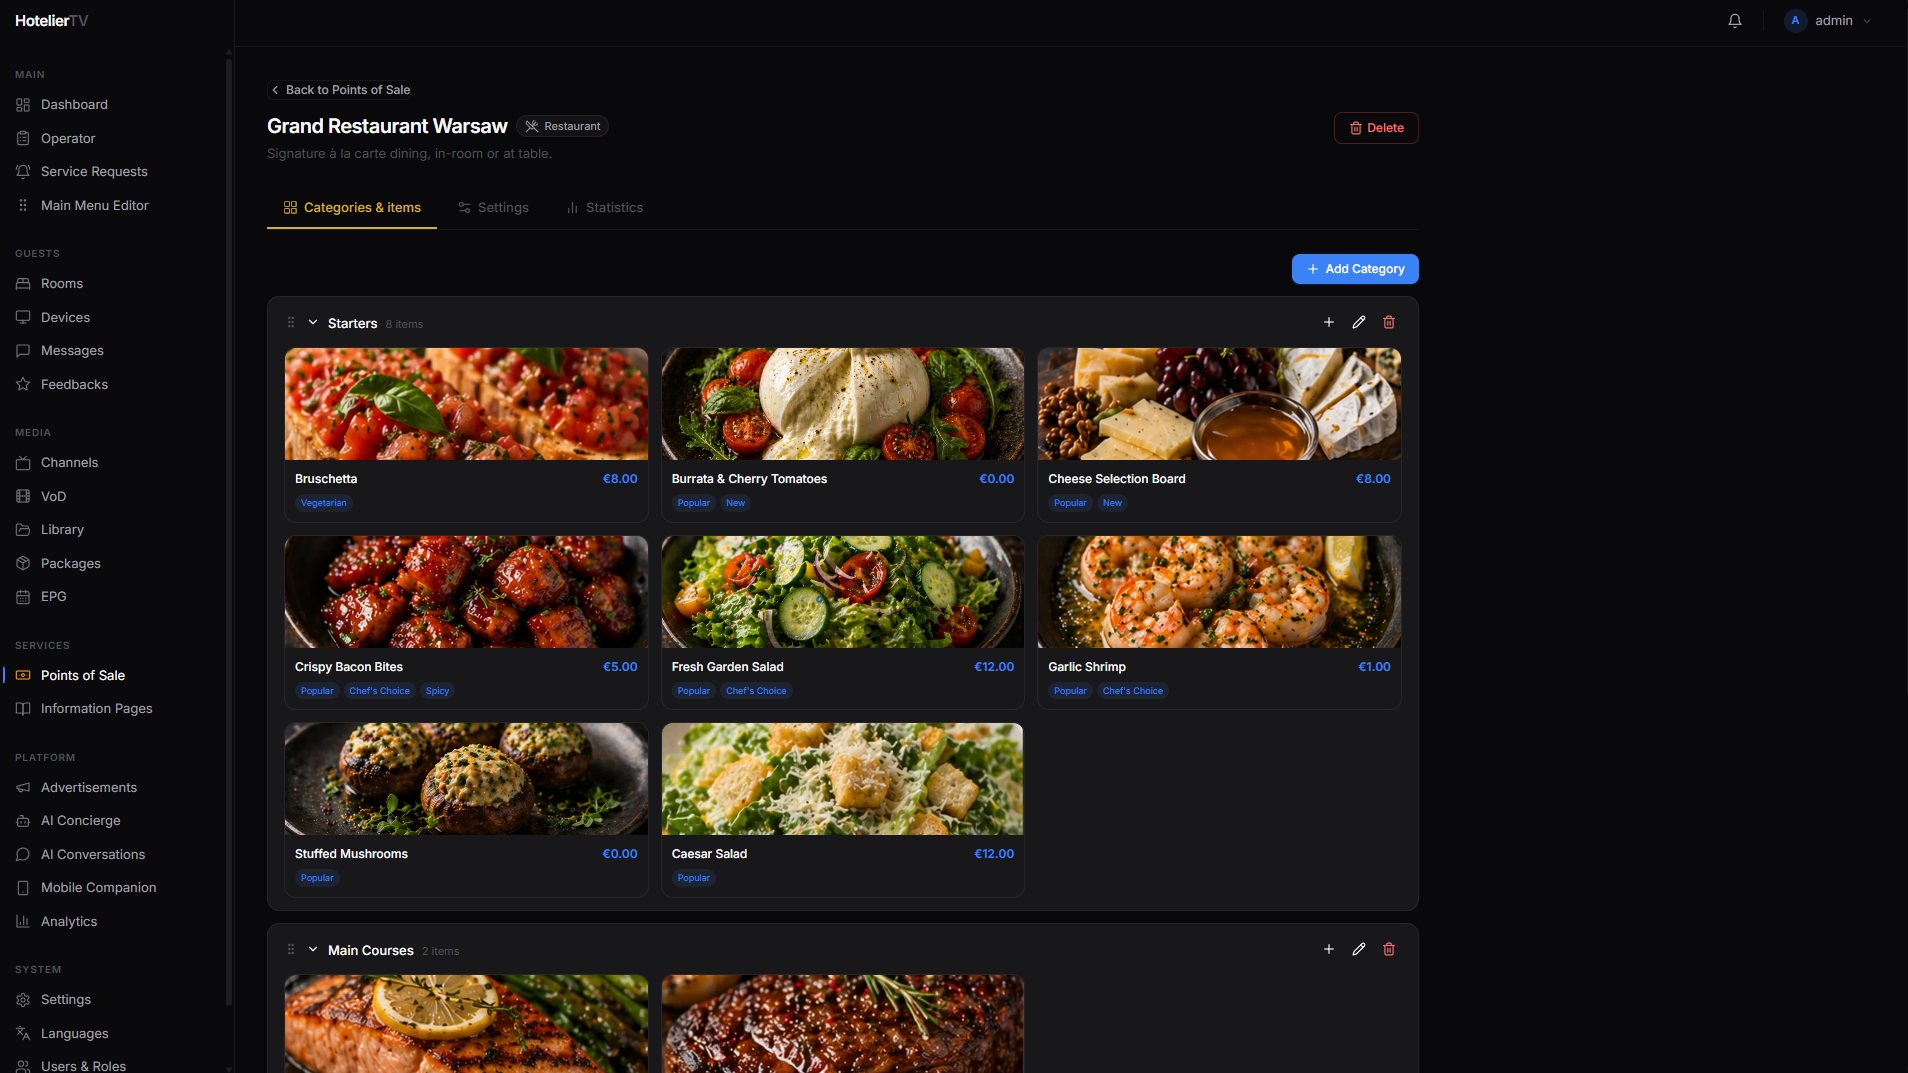
Step 4: Add categories and menu items
After creating, you land on the outlet's editor page. There are two panels:
- Categories (left) — Appetizers, Mains, Desserts, Drinks…
- Items (right) — the dishes inside the selected category.
To add a category, click [+ Add category], type a name, save.
To add an item, click [+ Add item]. Fill in name, description, price, and optionally a photo. Save.
Tip: Add categories first, then items. You can drag items between categories later if you change your mind.
Step 5: Make it appear on the TV
The restaurant exists, but guests can't see it yet. You need a tile in the Main Menu that links to it.
- Go to Main Menu Editor.
- Click [+ New item].
- Set Type to Service Area.
- In the Target dropdown, pick your new restaurant.
- Set a title, icon, and background. Save.
Or use the shortcut: in Main Menu Editor, click [Add standard services] to auto-create a "Hotel Services" submenu with all your areas linked.
What if it doesn't work?
"Failed to create" when saving the outlet: Name is required. Make sure it's filled in.
Items don't show up on the TV: Two things to check:
- The outlet's Active toggle is on.
- The Main Menu has a tile pointing to it.
Prices show in the wrong currency: Currency is set globally in Settings → Identity. Change it there, not per-outlet.
Image upload fails: Files must be under 5 MB. Use JPG, PNG, or WebP.