Mobile Companion
Enable the mobile web app guests use to view the menu, order, chat, and check the bill — all on their phone.
Mobile Companion
What you'll learn: How to turn on the Mobile Companion — a phone-friendly web app guests reach by scanning a QR code on the TV. They can browse the restaurant menu, place orders, chat with the AI concierge, and view their bill.
Time needed: 5 minutes.
Before you start
You'll need:
- Login access.
- Optionally: a square app icon (512×512 PNG) for "Add to Home Screen" usability.
Step 1: Open the Mobile Companion settings
In the left sidebar, under PLATFORM, click Mobile Companion.
The page has three tabs: Settings, Active sessions, Analytics. Stay on Settings for now.
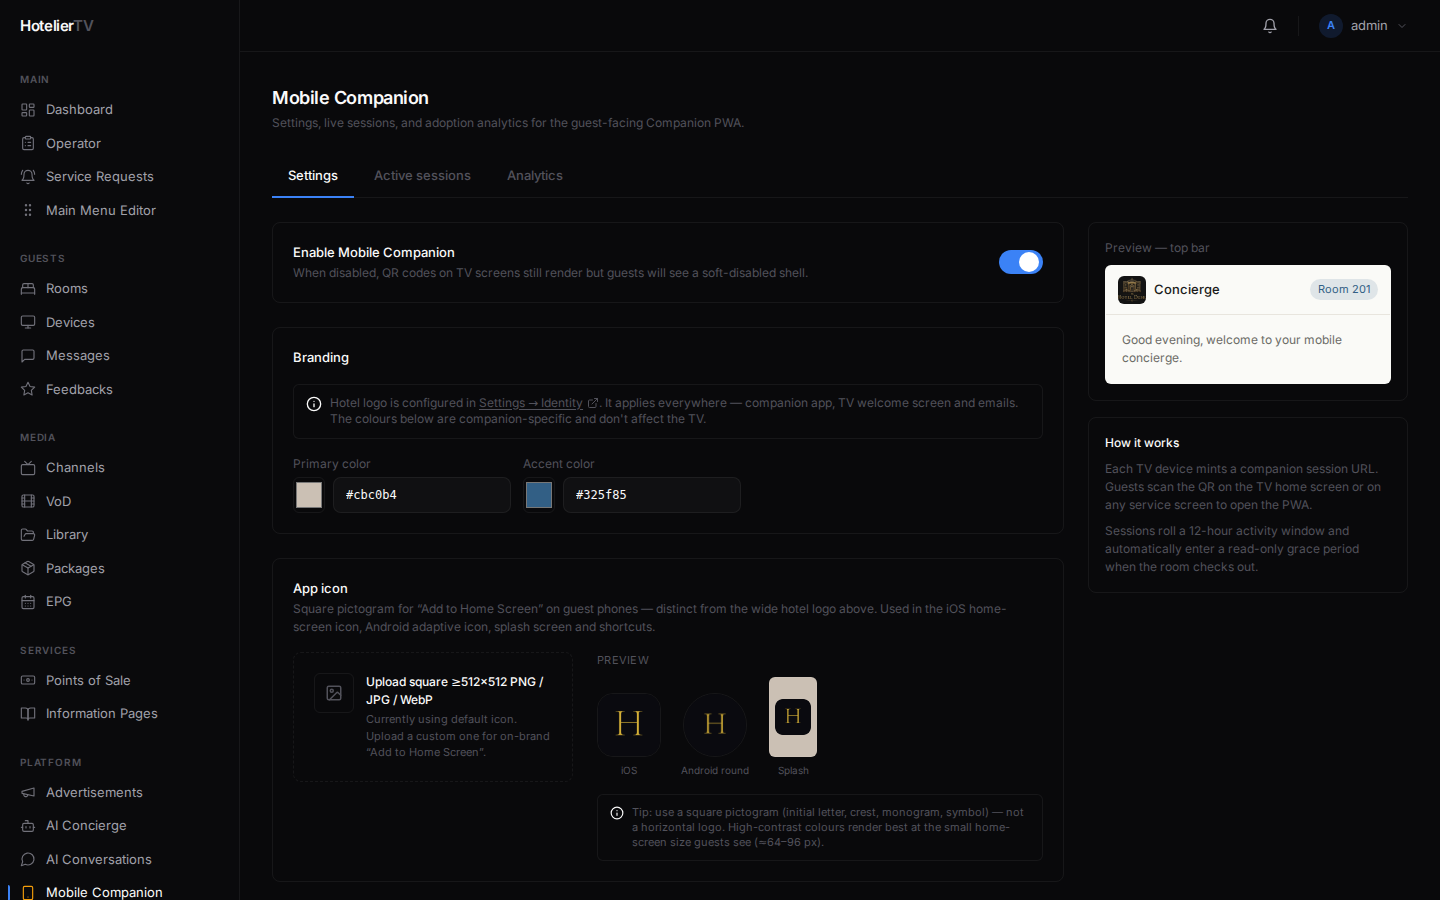
Step 2: Turn on the Mobile Companion
At the top of the Settings tab, find the Enable Mobile Companion toggle. Click it to turn it on.
When it's off, QR codes still render on the TV but tapping them shows a "companion disabled" message. With it on, guests get the full experience.
Step 3: Pick brand colors
Under Branding, choose:
- Primary color — main brand color, used for buttons and accents.
- Accent color — secondary color for highlights.
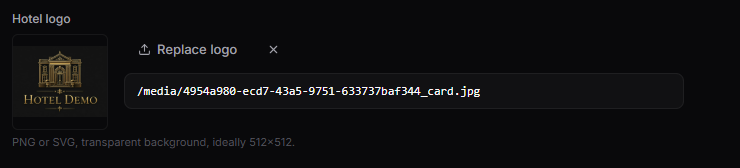
The hotel logo is not set here — it comes from Settings → Identity, so it's the same everywhere.
Step 4: (Optional) Upload an app icon
Scroll down to the App icon section. Click [Choose icon] and pick a square PNG (at least 512×512).
This icon is shown when a guest installs the companion as a phone app ("Add to Home Screen"). It's separate from your hotel logo because a square pictogram works better at small sizes.
If you skip this, the system uses a sensible default.
Step 5: Set display behavior
Under Display, the toggle Show QR codes on TV Home & service screens controls whether a small QR code appears in the corner of TV screens. With it on, guests can scan from any screen. With it off, they only get the QR from the dedicated "Mobile Menu" tile (cleaner look, fewer interruptions).
Recommended: leave on for a hotel, off for a bar or pool area where the TV is shared by many people.
Step 6: Adjust session limits
Under Session:
- Max concurrent sessions per room — defaults to 1. If a couple is sharing a room and both want their own session, raise it to 2.
- Post-checkout grace period (hours) — defaults to 24. After checkout, guests can still see their bill and leave feedback for this many hours; ordering is disabled.
Step 7: Click Save
Click the blue [Save] button at the bottom right of the Settings panel.
Step 8: Make the QR tile available on the TV
In Main Menu Editor, look for a tile of type Mobile Menu (QR). If missing, click [+ New item], set Type = Mobile Menu (QR), give it a title (e.g. "Mobile Menu"), and save.
Now guests have a dedicated full-screen QR they can scan from the TV home menu.
Per-tile mobile visibility
Not every tile makes sense on a phone (like "Live TV"). Scroll down to the Mobile Menu Visibility section in this same Settings page. You'll see all your menu items with a per-item Show on mobile companion toggle. Turn off the ones that aren't useful on a phone.
What if it doesn't work?
QR scans but the page won't open:
- Phone needs internet. Hotel guest WiFi should work.
- Companion is disabled. Toggle it back on at the top.
The companion doesn't show my logo: The logo comes from Settings → Identity. Set it there.
Settings won't save: Refresh the page and try again. If still failing, sign out and back in.