Hotel Branding
Set your hotel name, logo, address, and other identity that shows up across the TV system.
Hotel Branding
What you'll learn: How to set the hotel name, logo, contact info, and localization (timezone, currency, default language) that appears across guest TVs, the mobile companion app, and emails.
Time needed: 5 minutes.
Before you start
You'll need:
- Login access.
- A logo file — PNG with transparent background works best, ideally 512×512 pixels, under 2 MB.
- Your hotel's address, email, phone, and (optionally) WhatsApp number.
Step 1: Open Settings → Identity
In the left sidebar, under SYSTEM, click Settings.
The Settings page has tabs across the top: Identity, WiFi, Weather, Flights, Intro, Screensaver, System, API.
Click the Identity tab.
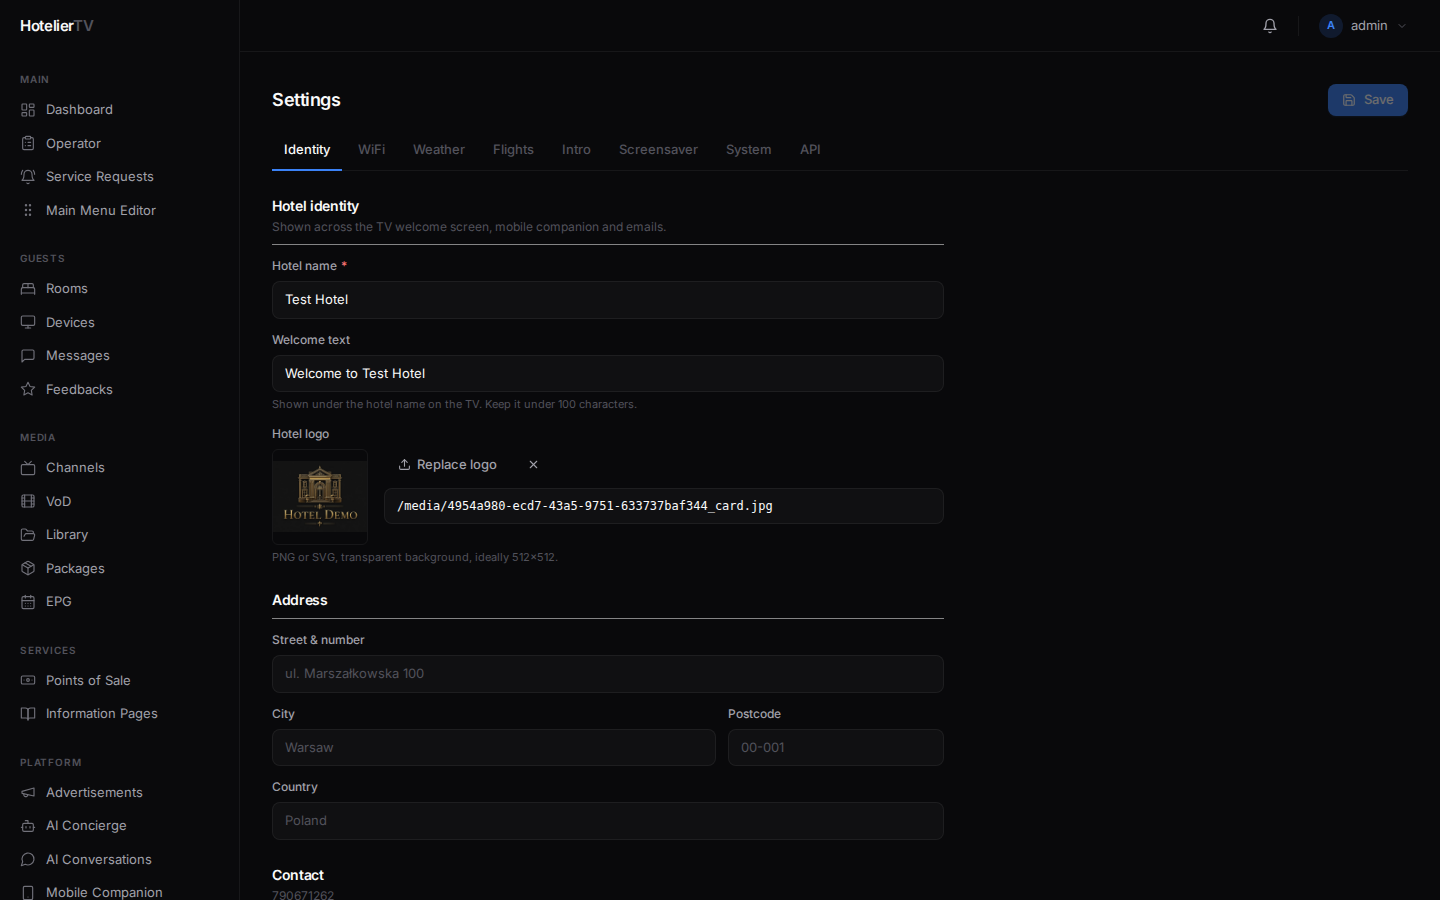
Step 2: Hotel identity
Under Hotel identity, fill in:
- Hotel name (required) — "Grand Palace Hotel". Shows on the TV welcome screen, mobile companion, and emails.
- Welcome text — friendly subtitle (e.g. "Welcome to an unforgettable stay."). Up to 120 characters.
- Hotel logo — click [Upload logo] and pick a file. Or paste a URL into the field below.
Important: The logo here is the single source of truth — it's used by the TV, mobile companion, and emails. Don't try to set it separately for the companion; this is the place.
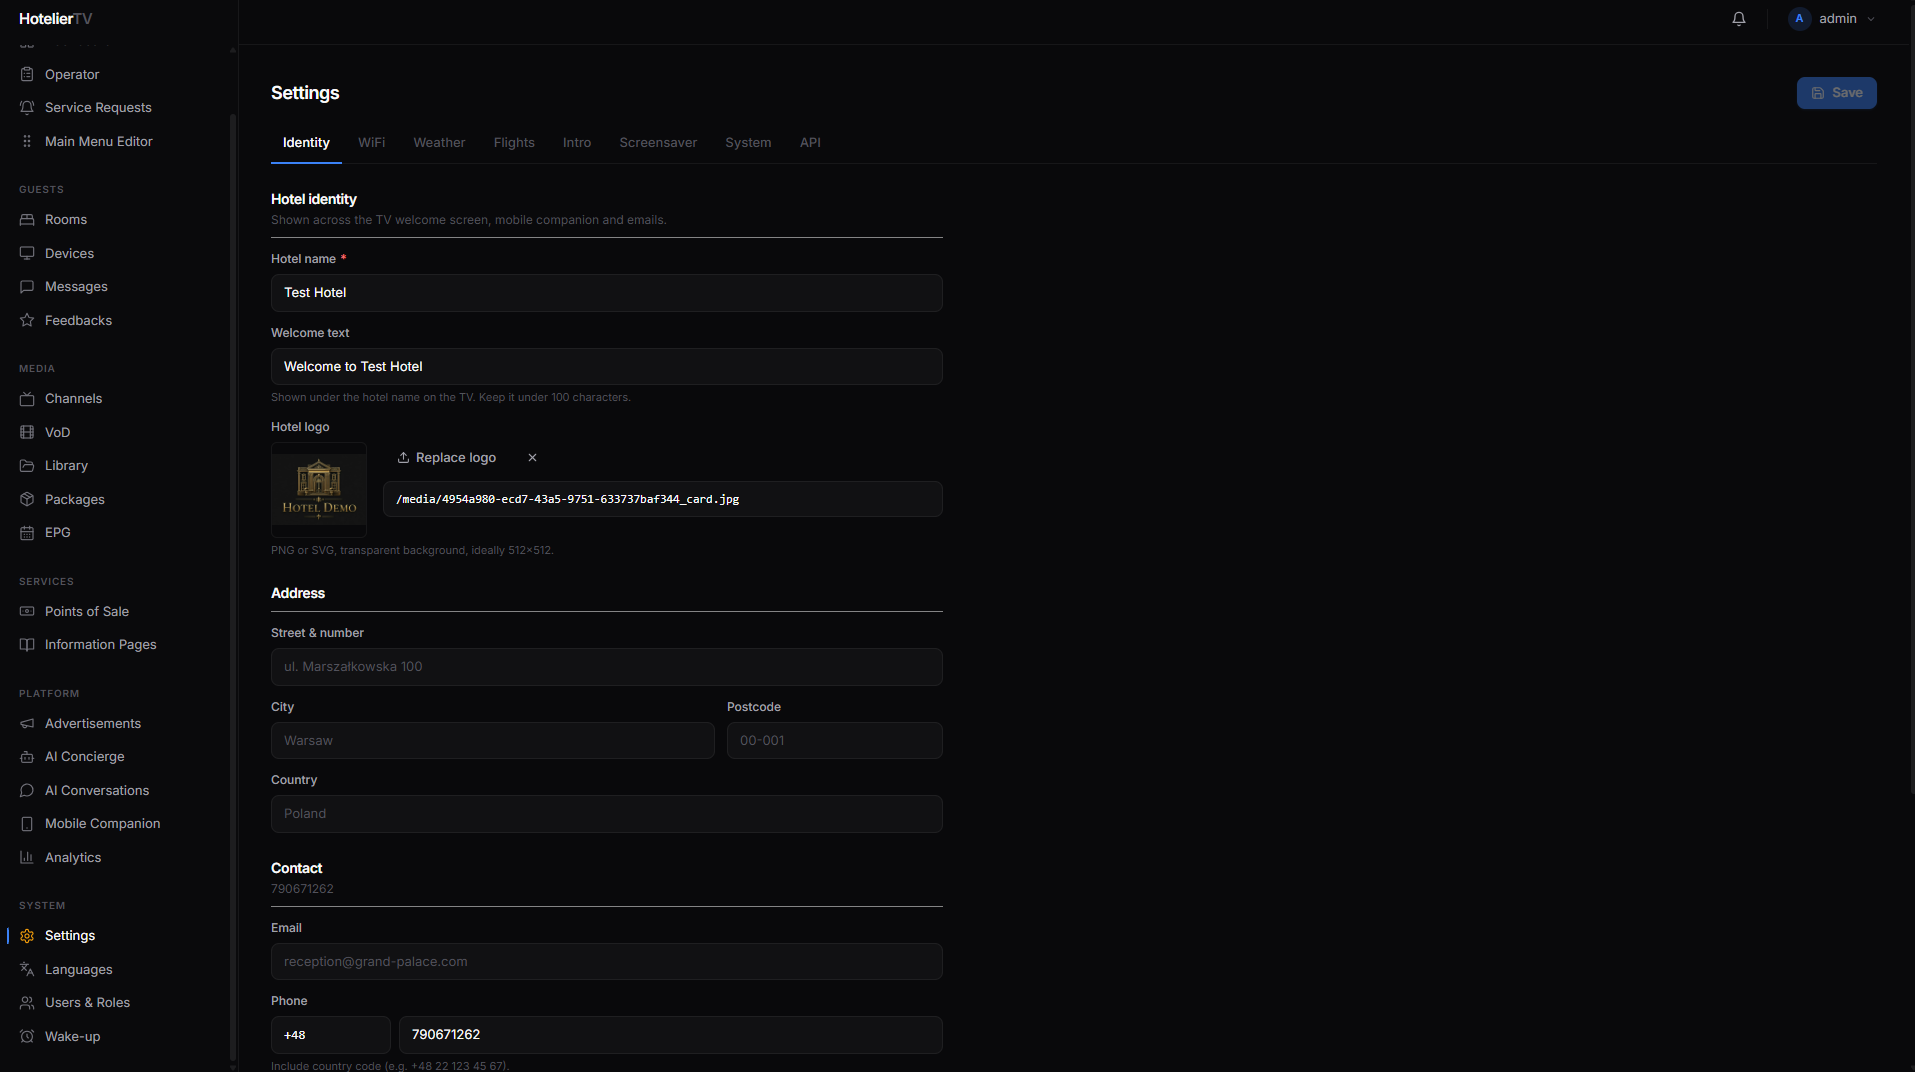
Step 3: Address
Fill in Street & number, City, Postcode, and Country. Used in invoices and confirmation emails.
Step 4: Contact
- Email — reception or front-desk email.
- Phone — a country code field plus the local number. Used by the TV's "Call Reception" tile.
- WhatsApp number — digits-only with country code, no spaces or
+. Example:48221234567. Used by the WhatsApp tile in Mobile Companion.
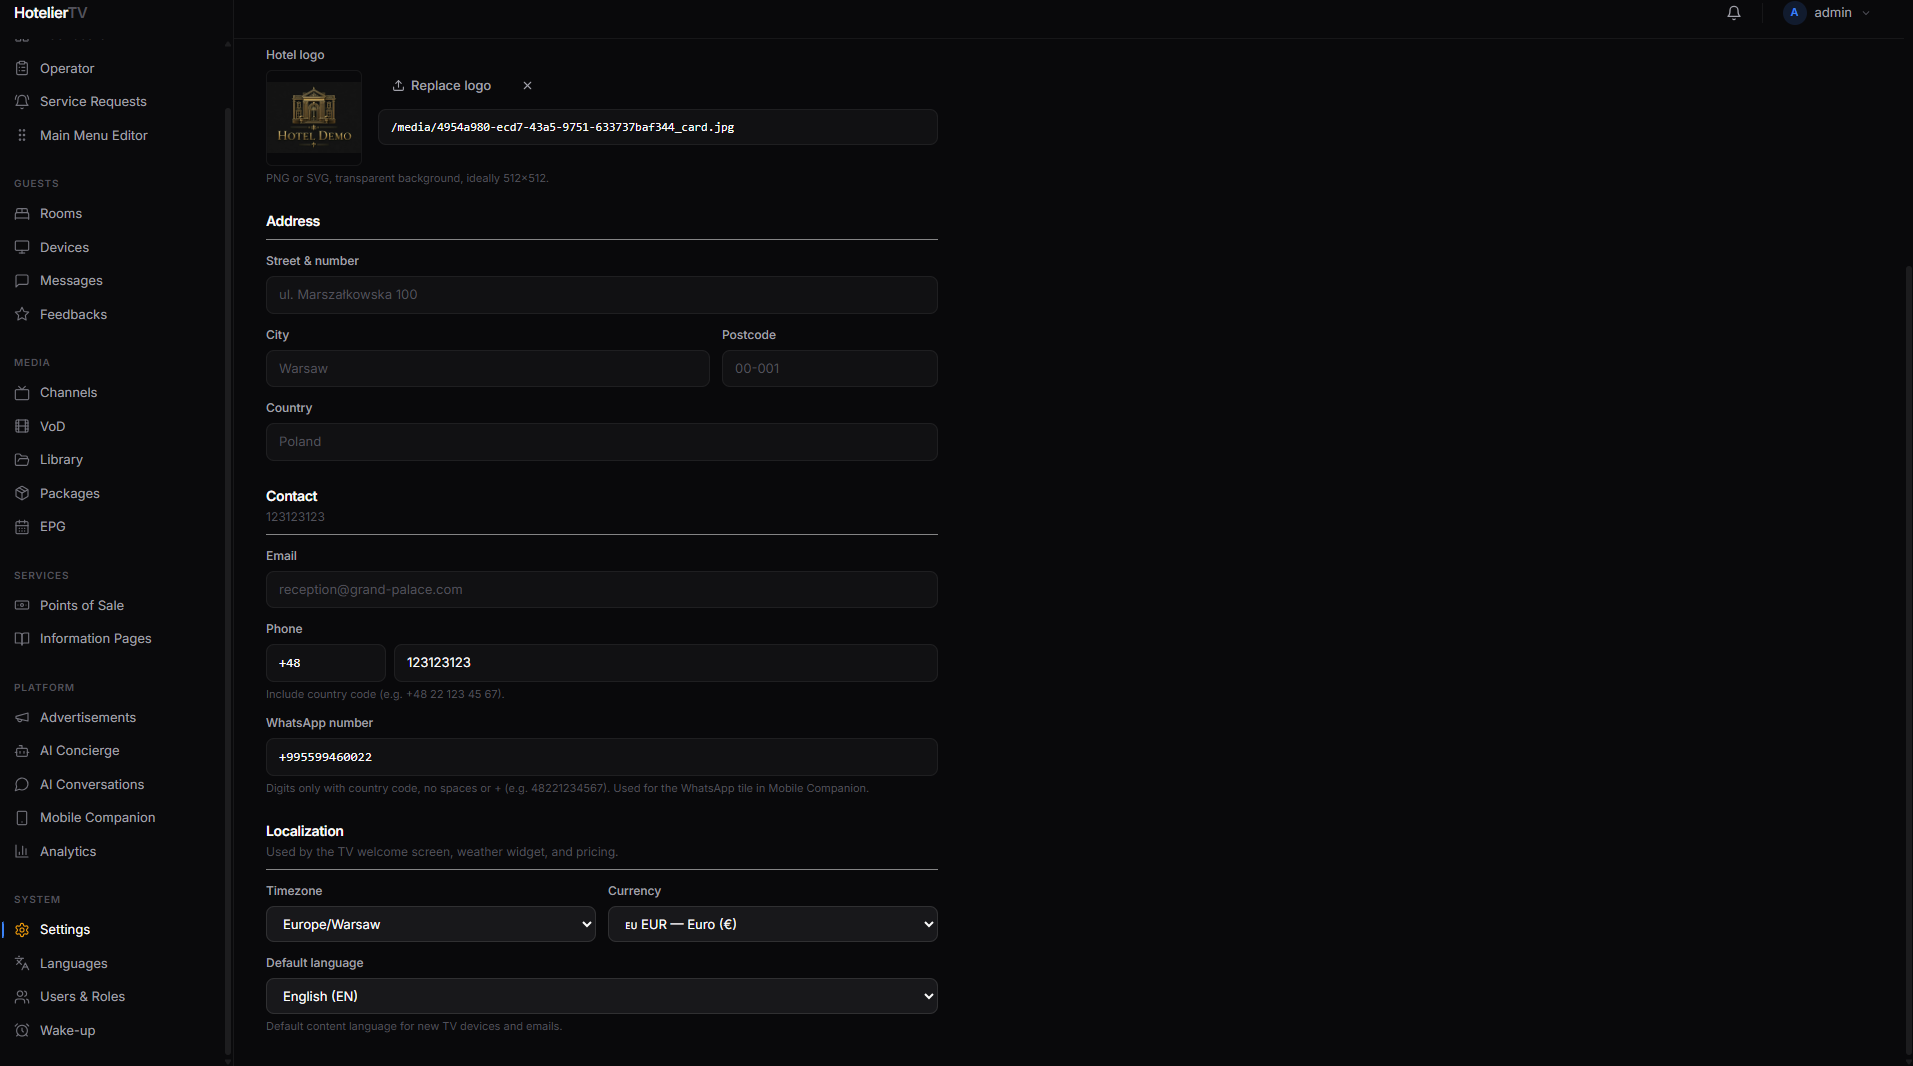
Step 5: Localization
- Timezone — pick from the list. Used by the clock widget and email timestamps.
- Currency — used everywhere prices are shown (restaurants, VoD, etc.).
- Default language — language used for new TV devices and outgoing emails. Guests can switch their TV's language individually after check-in.
Step 6: Save
Scroll up and click the [Save] button at the top right of the page. The button shows "Saved" in green for a moment when done.
What if it doesn't work?
Logo upload fails:
- File must be under 2 MB.
- Supported formats: PNG, JPEG, WebP, SVG.
- Try a smaller or different file.
Logo looks wrong on the TV:
- Use a transparent PNG so it works on any background.
- A square aspect ratio (e.g. 512×512) is most flexible.
Save button stays greyed out: You haven't changed anything yet. Edit a field and the button activates.
TV still shows old name/logo after saving: TVs cache content. Wait a minute, or go to Devices and use Cache reload on a specific TV.